Improved internal memory configuration (lower ! memory usage), fixed beta45 startup issue, fixed Set Save Directory & 2-panel mosaics.
May 27 2026 APP 2.0.0-beta45 has been released !
Fully Multi-Threaded LNC, many improvements for the registration engine, platform upgrade, and further tuning of internal memory consumption and memory release back to OS.
Apr 14 2026: Google Pay, Apple Pay & WeChat Pay added as payment options
Update on the 2.0.0 release & the full manual
We are getting close to the 2.0.0 stable release and the full manual. The manual will soon become available on the website and also in PDF format. Both versions will be identical and once released, will start to follow the APP release cycle and thus will stay up-to-date to the latest APP version.
Once 2.0.0 is released, the price for APP will increase. Owner's license holders will not need to pay an upgrade fee to use 2.0.0, neither do Renter's license holders.
[Sticky] RGB Combine tool: a LHaRGB example using H-alpha as both Luminance and Red.
I am on the fence about purchasing this software, I think it has amazing potential,.i love the stacking process and light pollution removal, bug I am having trouble getting good colors again. I understand you all are busy and have your own lives but....if someone had time, would you mine looking at my data? 🙂
I am attempting to process this now also..when I load hargb ( I put ha as Luminance) which slider do I adjust if any...for example if I want to weight the rgbif the exposure times are different...for exapexa..if I have 1 hour red, 1 hour green, then 1.5 hours blue (and say 5hours Ha). What slider do I move and how does that work?)
Then, do I save the image and load into a different step? Is there a workflow for post processing of lrgb or HaRGB? I don't know if I should be doing a synthetic luminance or not and if so, how do I do that? Do you make synthetic chrominance also?
So I was able to do HaRGB combine, and added HA for luminance and added another HA into red also. I was able to get decent colors with RGB combine, then I did light pollution removal, then background calibration, the I went into star colors and my image turned blue....* the nebula turned blue after it was a nice pretty red. Any idea why? I am not sure why that happened so I cancelled out of the star color calibration and just did not know what I was doing wrong. Any help is appreciated! I
these images are without accepting the star color calibration. one of the images I took into StarTools for final noise reduction
I am on the fence about purchasing this software, I think it has amazing potential,.i love the stacking process and light pollution removal, bug I am having trouble getting good colors again. I understand you all are busy and have your own lives but....if someone had time, would you mine looking at my data? 🙂
So I was able to do HaRGB combine, and added HA for luminance and added another HA into red also. I was able to get decent colors with RGB combine, then I did light pollution removal, then background calibration, the I went into star colors and my image turned blue....* the nebula turned blue after it was a nice pretty red. Any idea why? I am not sure why that happened so I cancelled out of the star color calibration and just did not know what I was doing wrong. Any help is appreciated! I
these images are without accepting the star color calibration. one of the images I took into StarTools for final noise reduction
The star color calibration in APP 1.058 was a bit of on the initial model calculation, it could very well explain the total blue result. (Have seen it on some images as well). So in APP 1.059 some adjustments in the model calculation were made, so that should definitely work better.
But, I will process your frames tomorrow and show the result 😉
Okay, I have downloaded your data and did a processing using APP's tools.
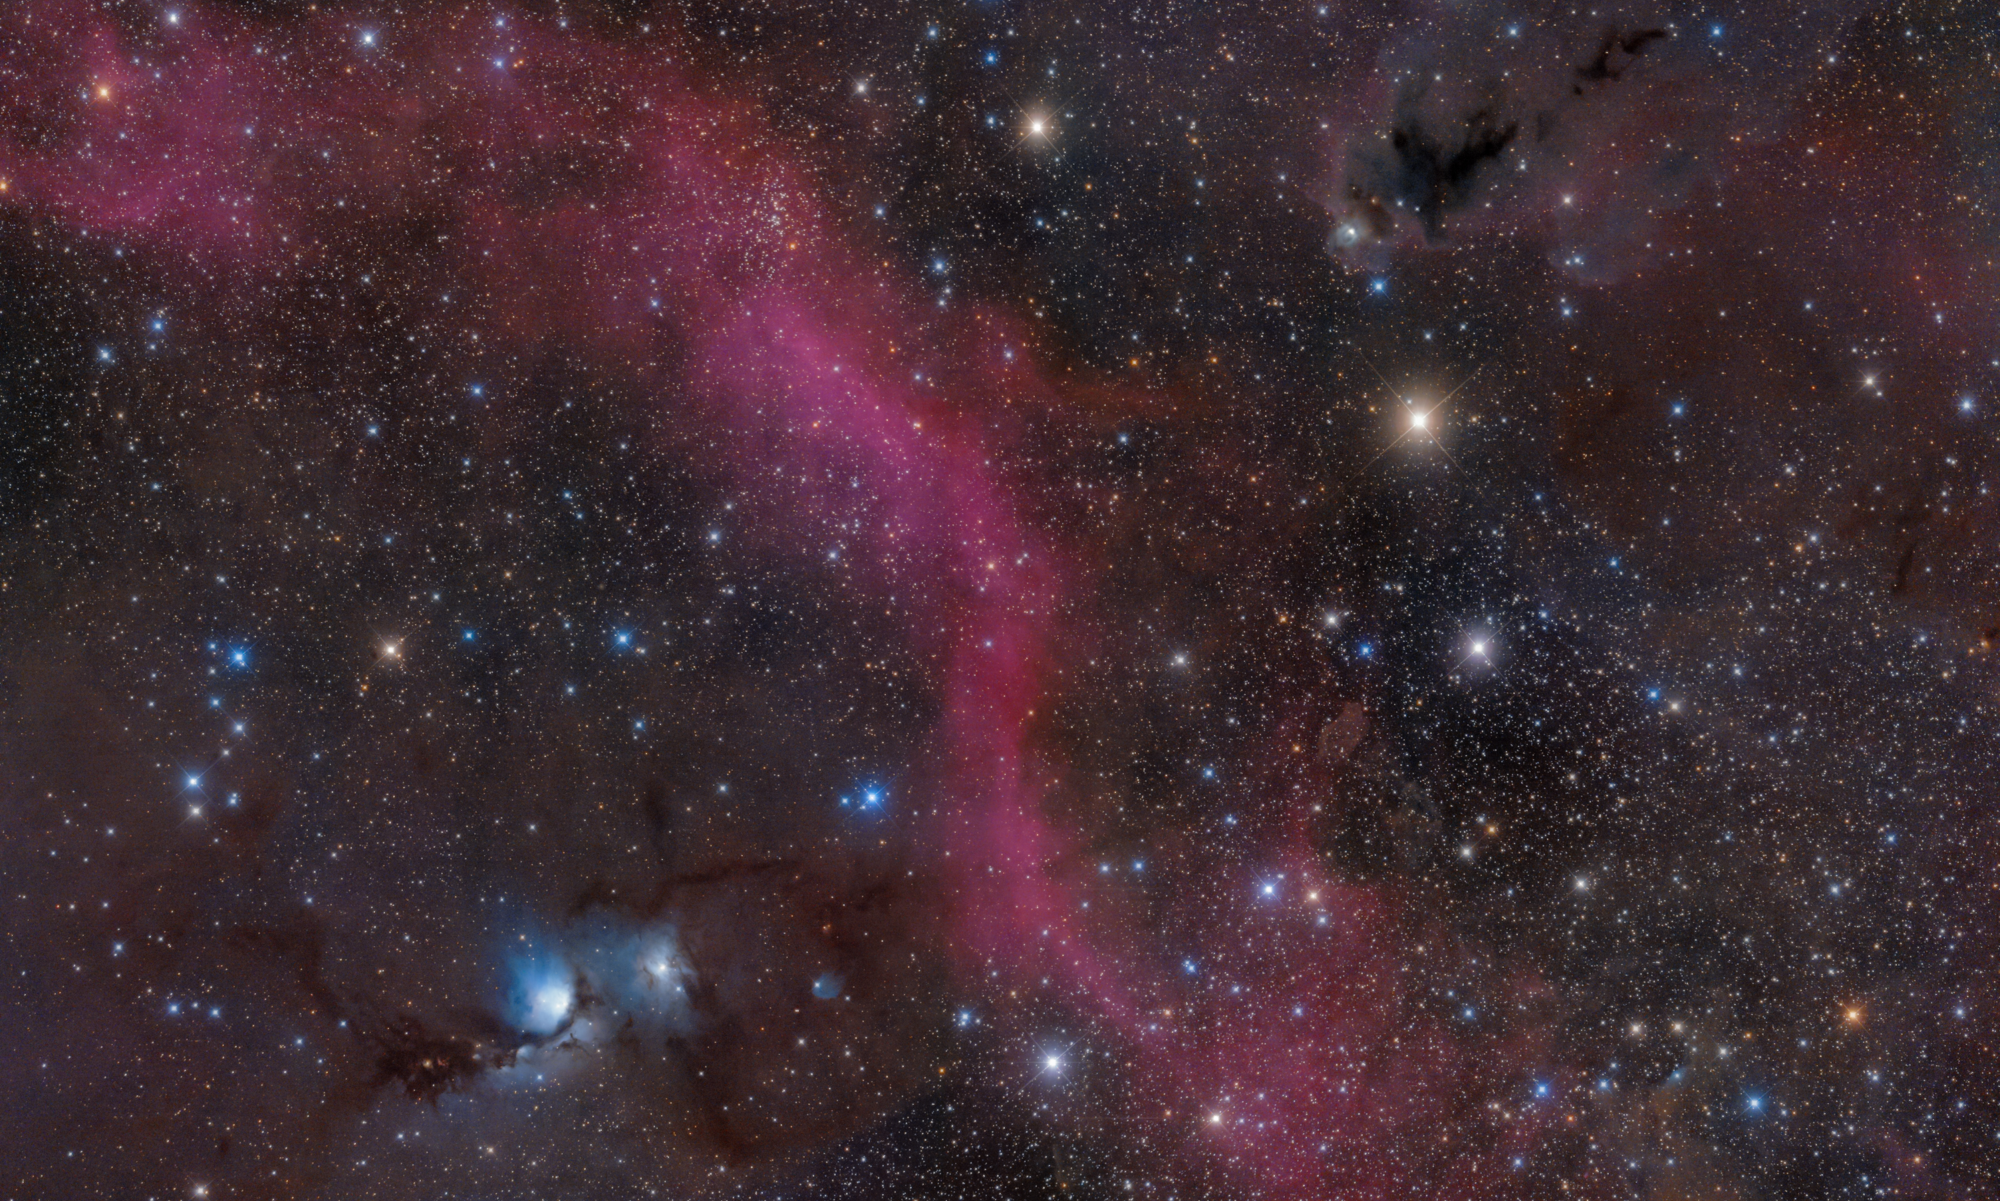
Before I show the steps, I will point out that the data is very nice, especially the H-alpha data looks very good 😉
If you would use Multi-Band Blending (6) MBB in integration) in the creation of the individual layers in combination with Local Normalization Correction, you will probably have a bigger field of view to show in the final image as well, so I think it's worth reintegrating all panels with MBB and LNC.
And the final result will depend a lot on background correction using the Remove Light Pollution tool.
(I think that if i would redo every step, that the result will be better because I now know better where nebulosity is and where not. )
Step 1) I load the R,G, B & Ha channels into the RGB combine tool to have a look at how the data looks. I assing Red to Red, Green to Green, Blue to Blue, H-alpha to H-alpha when the tool starts.
R,G,B will have a multiplier of 1.0 to start with. H-alpha is not enabled, since multiplier is 0.0.
Step 2) I did a small multiplier adjustment to correct Red and Blue, because green is a bit stronger. Blue x 1.5 and Red 1.75. Also enable saturation strongly to have a better look at the data:
Step 3) It's quite clear that there are huge gradients due to light pollution that we need to correct.
Doing this carefully before making the composite, will really help 😉 so I first corrected the R,G,B & H-alpha layers individually in the Remove Light Pollution tool:
Step 4) After correction, we load the corrected 4 channels into the RGB-combine tool, again only looking initially at R,G,B channels and an adjustment for Red and Blue:
Step 5) add H-alpha to the red channel, assign H-alpha for 100% to Red in the composite. Since the Red channel is added as well, both contribute for 50% in the composite:
Step 6) in the previous image the color of the nebula is very Red. If you adjust the H-alpha channel's Green and Blue contribution to the composite, you can give it a slightly different color and reduce the Red somewhat. I added the H-alpha layer for 25% to both green and blue in the composite. Now the nebula has a nicer color I think:
Step 7) this step is optional, since the H-alpha channel is of good quality, I will use it partly as the luminance in the composite, I assigned it for 50% to the composite's luminance. This means that the other 50% luminance values come from the HaRGB data that you see at step 6). The effect of this is that the H-alpha's luminance will be more prominent in your compositie. I also adjusted the Red and Blue multipliers a bit to keep the star colors a bit more balanced.(reduced blue multiplier in this case):
Step 8) this is already looking pretty nice, I saved step 7 in the RGB Combine tool. I did a crop with the Batch modify tool. Then I did the Remove Light Pollution Tool on the compositie and started the Star Color Calibration tool:
Step 9) as this point I realized, that the gradient/light pollution is not entirely correct. So I ran the Remove Light Pollution tool again, to reduce a gradient on the Top-Right side of the Nebula. Normally, I would now return to step 1 and first correct all layers individually and redo all steps up until here:
step 10) final step is tweaking the composition by another crop and playing with the preview filter's sliders. And then I created 2 different JPGs at 100% using the save button below the histogram for publication on the forum:
And in 1 picture, Adam's results and mine:
Final notes:
the steps can be done in arbitary order in the RGB combine tool. Each calculate applies the composite parameters on the originally loaded channels.
to achieve a better initial composite for the RGB channels, it can be usefull, to normalize the channels in 5), in addition to only registering them. That will make the channels more compatible if you load them into the RGB combine tool.
if you load the channels into the RGB combine tool, the channels will be automatically corrected for their background levels. But you can adjust this by using the BG sliders per channel in the RGB combine tool. In this example, these BG sliders weren't needed at all.
Using the Remove Light Pollution tool needs practise on the tool, but also on the data. If I see the pictures now, I think it needs redoing and that will surely correct the background to a higher degree. There is a too black area in this case to the right of the Nebula I think...
Adam, let me know if this helps and clarifies the composte tool.
Wow. Thanks for all that work you put in! I so appreciate it. I will try messing with some m81/m82 data now :) Thanks again, this was super helpful!!!!
Sorry to bring up this topic again. I finally got a new computer and am doing some reprocessing of data. I saw a tutorial on HaRGB on here, and it said to combine RGB first - process this with rgb combine then LP removal and then star color calibration. then add this image to RGB combine tool again but adding HA this time. What is the best tool to use? adding HaRGB into the combine all at once, or doing RGB first with color calibration and then adding HA after?
One more question - I seem to get lots of green stars....what's the best way to adjust the sliders to remove green stars 😉
I would first make the RGB and correct that, it's broadband data that can be color corrected so you start with a nice basis. Adding Ha then in the combine tool and playing with how much to use is then a way to go.
Green stars, do you get them after color correction on the RGB?
I get green stars sometimes right when I add the RGB files into the RGB combine, re-calculate and then click the saturation check nmark ( without nmoving the sliders at all yet)
Just curious the best method to make the stars somewhat normal colors in RGB combine ( red, blue, yellow, white, oranage, etc...) and then also I go get greenish stars in the star color corrections module as well
Please let me know what the best method is if possible?
Mm, so when you perform star color correction, you can already look at a stretch and turn saturation on, to see the greenish stars. If you selected stars in area's without nebulosity, the correction should perform pretty well already. Sometimes though, e.g. when filters are used also for the RGB data, you might need to tweak the model a bit.
So you can check the slopes on the graphs, the white line is the standard black body model which is what APP expects the stars to be on (more or less). If you see that the line is not lying nicely in the median (or middle) of the star population in the graph, you can tweak them with the sliders on the left. So for instance to get green less prominent, you can slide the "magenta - green" constant slider a little to the left, towards magenta. The green line in the graph will now show what you changed over the white, standard line. The green line should the be more representative of the star population in the graph.