15th Feb 2024: Astro Pixel Processor 2.0.0-beta29 released - macOS native File Chooser, macOS CMD-Q fixed, read-only Fits on network fixed and other bug fixes
7th December 2023: added payment option Alipay to purchase Astro Pixel Processor from China, Hong Kong, Macau, Taiwan, Korea, Japan and other countries where Alipay is used.
I am working on a LHaRGB workflow using M51 data, i'll publish it soon. Same holds for the manual, an updated version will be uploaded soon. And more video tutorials as well.
Regarding your trial period, i'll be easy with extending it, since the documentation is not ready yet 😉 so that's only fair.
cheers newbies like me struggle with new software,i have the data in the images but no way of processing them,good luck with your software though thanks ian
I only adjusted the normalization mode, I set it to advanced. If you are combining data of just 1 telescope/objective and 1 camera, you can leave this at regular mode. The advanced mode becomes really usefull if you combine data of different sources, different imaging sessions and if your frames don't perfectly overlap over the whole field of view.
Is it clear from the video how you can register and combine your different color channels?
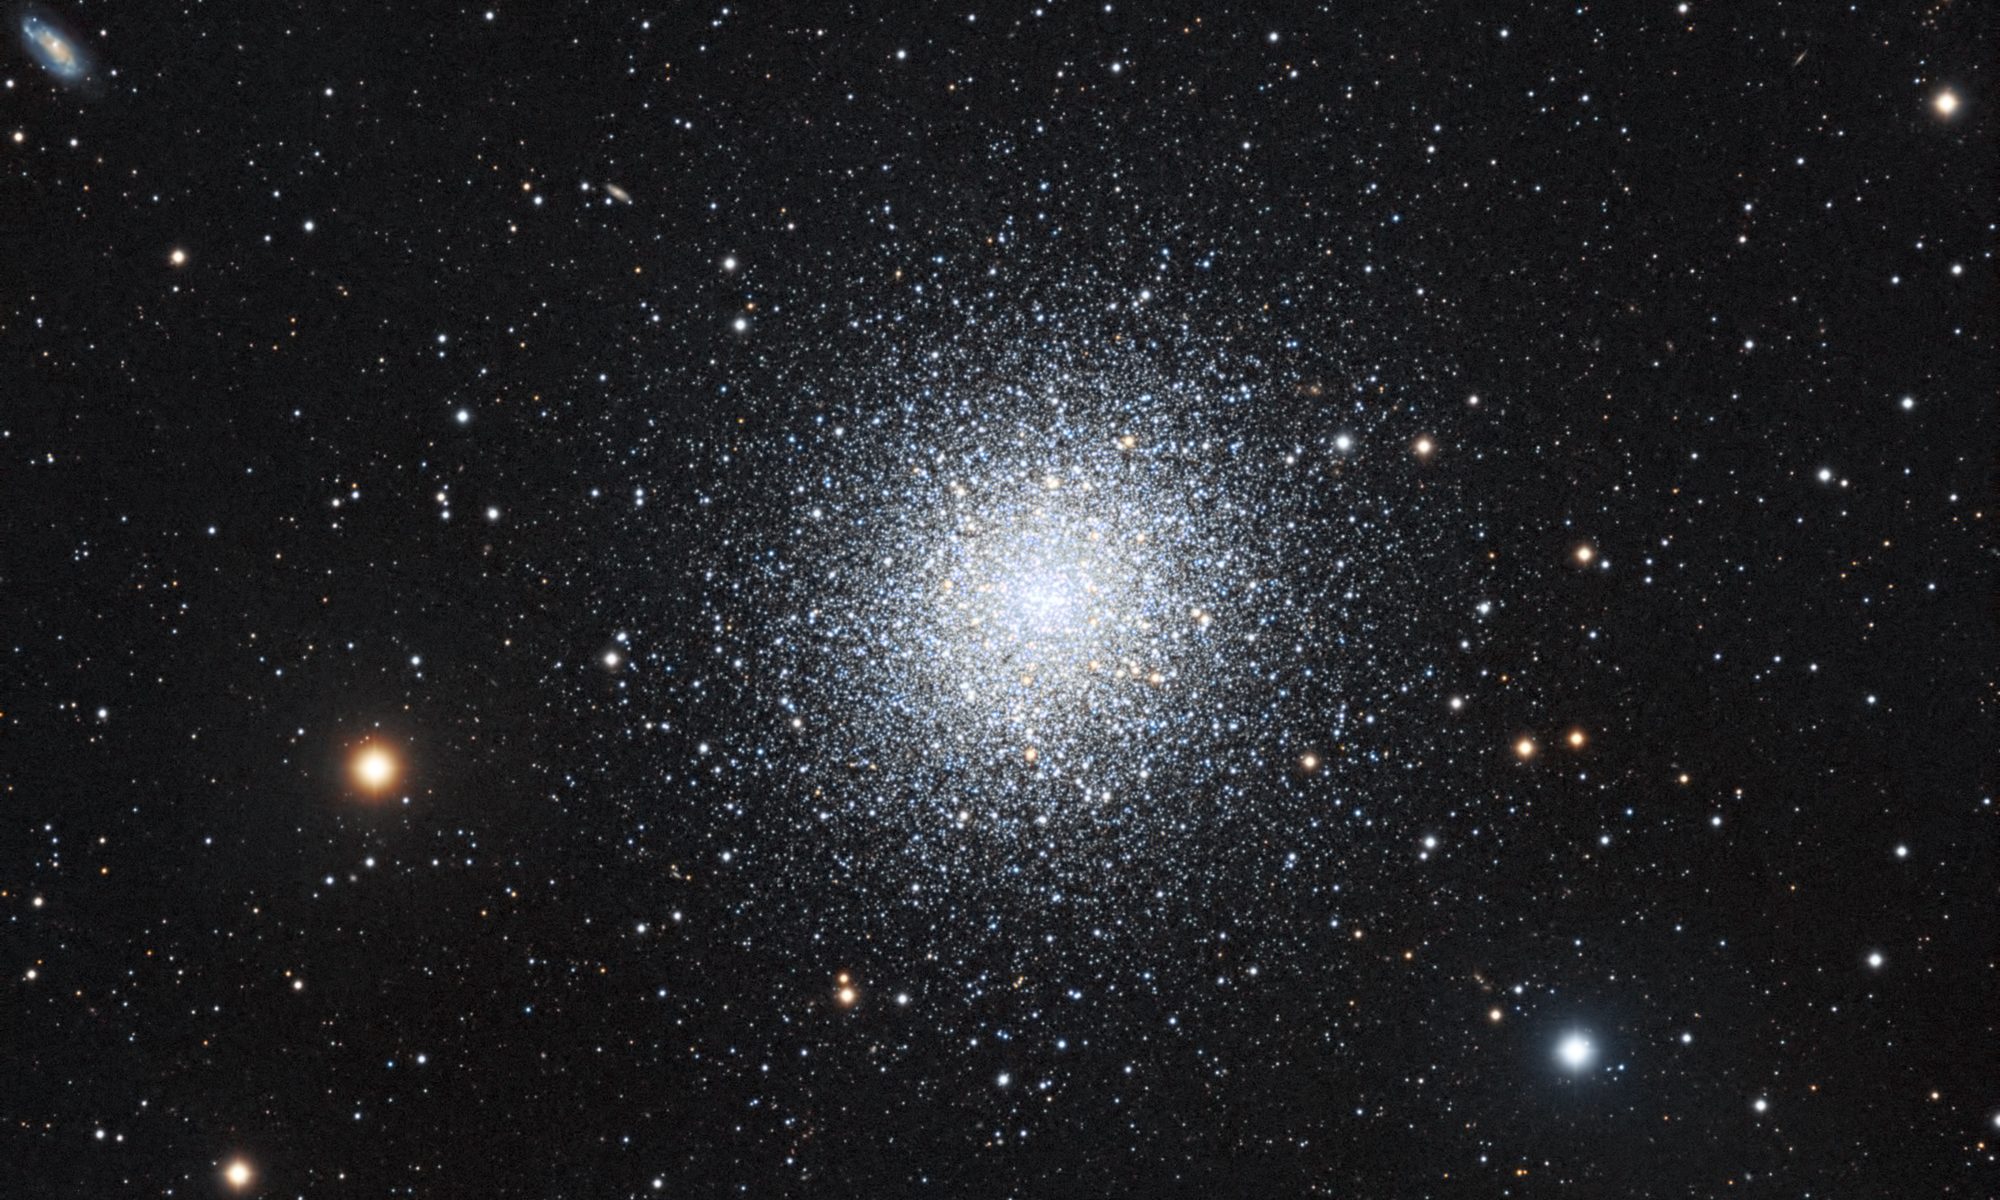
The image of M81 (?) looks pretty good, but if you haven't calibrated the frames yet, then yes, the calibration is the first step in data processing 😉
Maybe have a look at this video I just uploaded, I show how to load the calibration frames, create calirbation masters and how APP will apply them to your data:
hi mabula managed to get my 3 seperate stacks of RGB,but when i put them into the combine rgb tool i get the following red image ,any thoughts and once again thanks
That last one is a great tutorial. I just have one question, where can a newbie like me find, WHY you make certain choices in the integration panel like median or average integration, which LNC level to pick etc....
hi mabula managed to get my 3 seperate stacks of RGB,but when i put them into the combine rgb tool i get the following red image ,any thoughts and once again thanks
I have downloaded your R,G,B channels. When you start the RGB combine tool, you load the images and assign them to a name, so assing the Red data to "RED" for instance.
Then when the frames are loaded. You will need to adjust the sliders of the RGB combine tool:
The tool starts with all sliders at 0.
So for the "RED" data, assing it for 100% to Red to start with 😉
That last one is a great tutorial. I just have one question, where can a newbie like me find, WHY you make certain choices in the integration panel like median or average integration, which LNC level to pick etc....
thanks again for a great tutorial!
Thank you Michel,
Check this topic for median/average and which outlier rejection:
Regarding LNC and MBB, I still need to create a FAQ for this as well 😉
But simply said:
MBB, just enable it with 5-10%, using it will slow down the integration speed, because more data needs to be handled. But, I always enable MBB to reduce any stack artefacts.
LNC, you get the most profit from this if you combine data from different nights and/or different setups. But even on data shot with the same OTA + camera on the same night, LNC will give you an improvement of the stack over the entire field of view. Simply start with LNC 1st degree and 1 iteration and compare this to an integration without LNC. It will give you an impression on what changes in the stack due to the use of LNC.
Both LNC and MBB are new concepts in the Deep Sky image processing sphere, so I will certainly make an extensive FAQ for this with more explanation 😉
hi mabula managed to get my 3 seperate stacks of RGB,but when i put them into the combine rgb tool i get the following red image ,any thoughts and once again thanks
I have downloaded your R,G,B channels. When you start the RGB combine tool, you load the images and assign them to a name, so assing the Red data to "RED" for instance.
Then when the frames are loaded. You will need to adjust the sliders of the RGB combine tool:
The tool starts with all sliders at 0.
So for the "RED" data, assing it for 100% to Red to start with 😉
The first thing I would do now, is to use the "remove light pollution" tool and "calibrate background" tool. This will help you in getting the background flat by removing the gradients that are still there. A clear gradient runs from the top right corner to the bottom left. Applying backgroun calirbation will ensure that you have a neutral background.
I'm struggling to pre-process fit files from my QHY8 Pro colour ccd. More importantly the de-bayering process. I always end up with grey images - not de-bayered. I have tried the various pattern variants to no avail. Any help welcomed.
I'm struggling to pre-process fit files from my QHY8 Pro colour ccd. More importantly the de-bayering process. I always end up with grey images - not de-bayered. I have tried the various pattern variants to no avail. Any help welcomed.
A month or so ago, you had posted a version 0.4 of the manual (Quick Reference Guide). I've searched throughout the entire forum; and, for the life of me, I can't find it. Could you please post a link to this version of the guide? I know it wasn't complete, but it definitely had some very useful information.
Also, a suggestion - even though it's not complete, I think it would be very helpful to have an obvious link on your site to this documention. Perhaps something like changing the Video Tutorials link at the top (between Presentations and About) to "Tutorials/Manuals" would make it very easy for users to find this helpful information?