It did take a long time to have the work finished on this and it will have a major performance boost of 30-50% over 2.0.0-beta39 from calibration to integration. We extensively optimized many critical parts of APP. All has been tested to guarantee correct optimizations. Drizzle and image resampling is much faster for instance, those modules have been completely rewritten. Much less memory usage. LNC 2.0 will be released which works much better and faster than LNC in it's current state. And more, all will be added to the release notes in the coming weeks...
Update on the 2.0.0 release & the full manual
We are getting close to the 2.0.0 stable release and the full manual. The manual will soon become available on the website and also in PDF format. Both versions will be identical and once released, will start to follow the APP release cycle and thus will stay up-to-date to the latest APP version.
Once 2.0.0 is released, the price for APP will increase. Owner's license holders will not need to pay an upgrade fee to use 2.0.0, neither do Renter's license holders.
Some basic questions about creating a Bad Pixel Map
Hi. I am just getting started, but am excited to begin processing what look like promising DSLR (modded Canon 6D) wide field images that I took a few nights ago of Orion. I wanted to start by using just my flats and darks to create a BPM, but the tutorials all refer to an earlier version where there was a "Calibrate" button just below the BPM section, and only darks and flats were needed. My current version offers "Save calibrated frames", but that returns an error: "No light frames available, so nothing to do". Should I also load my lights? Also, there's no point in checking for bad columns in a DSLR, as they shouldn't have any, right? Any comments would be appreciated.
Me again. I clicked instead on "create Masters and assign to lights", which wasn't obvious because I didn't load any Lights, only Darks and Flats, but this ran and ended up generating the Bad Pixel Map. No bad columns found, which was expected. So I may not need help at this point, but for a newbie it isn't clear what steps I need to take in what order. I will try and follow the DSLR workflow video and see where I get.
Oh, I did get this error message part-way through the BPM run:
CRITICAL WARNING: flat-field calibration can not be performed correctly!
To be able to perform accurate flat-field calibration, the provided flats need to be calibrated by either
- a MasterBias, of the same ISO/gain value as the flat frame, or - a MasterDarkFlat of the same ISO/gain value and the same exposure time as the flat frame, or - both
My thinking is that this can be disregarded, as I was only trying to build the BPM.
You also need bias frames to calibrate everything correctly. What I would do is to load all calibration frames and then select the create masters button. I agree it's not super obvious, a manual would be nice and I believe it's been worked on.
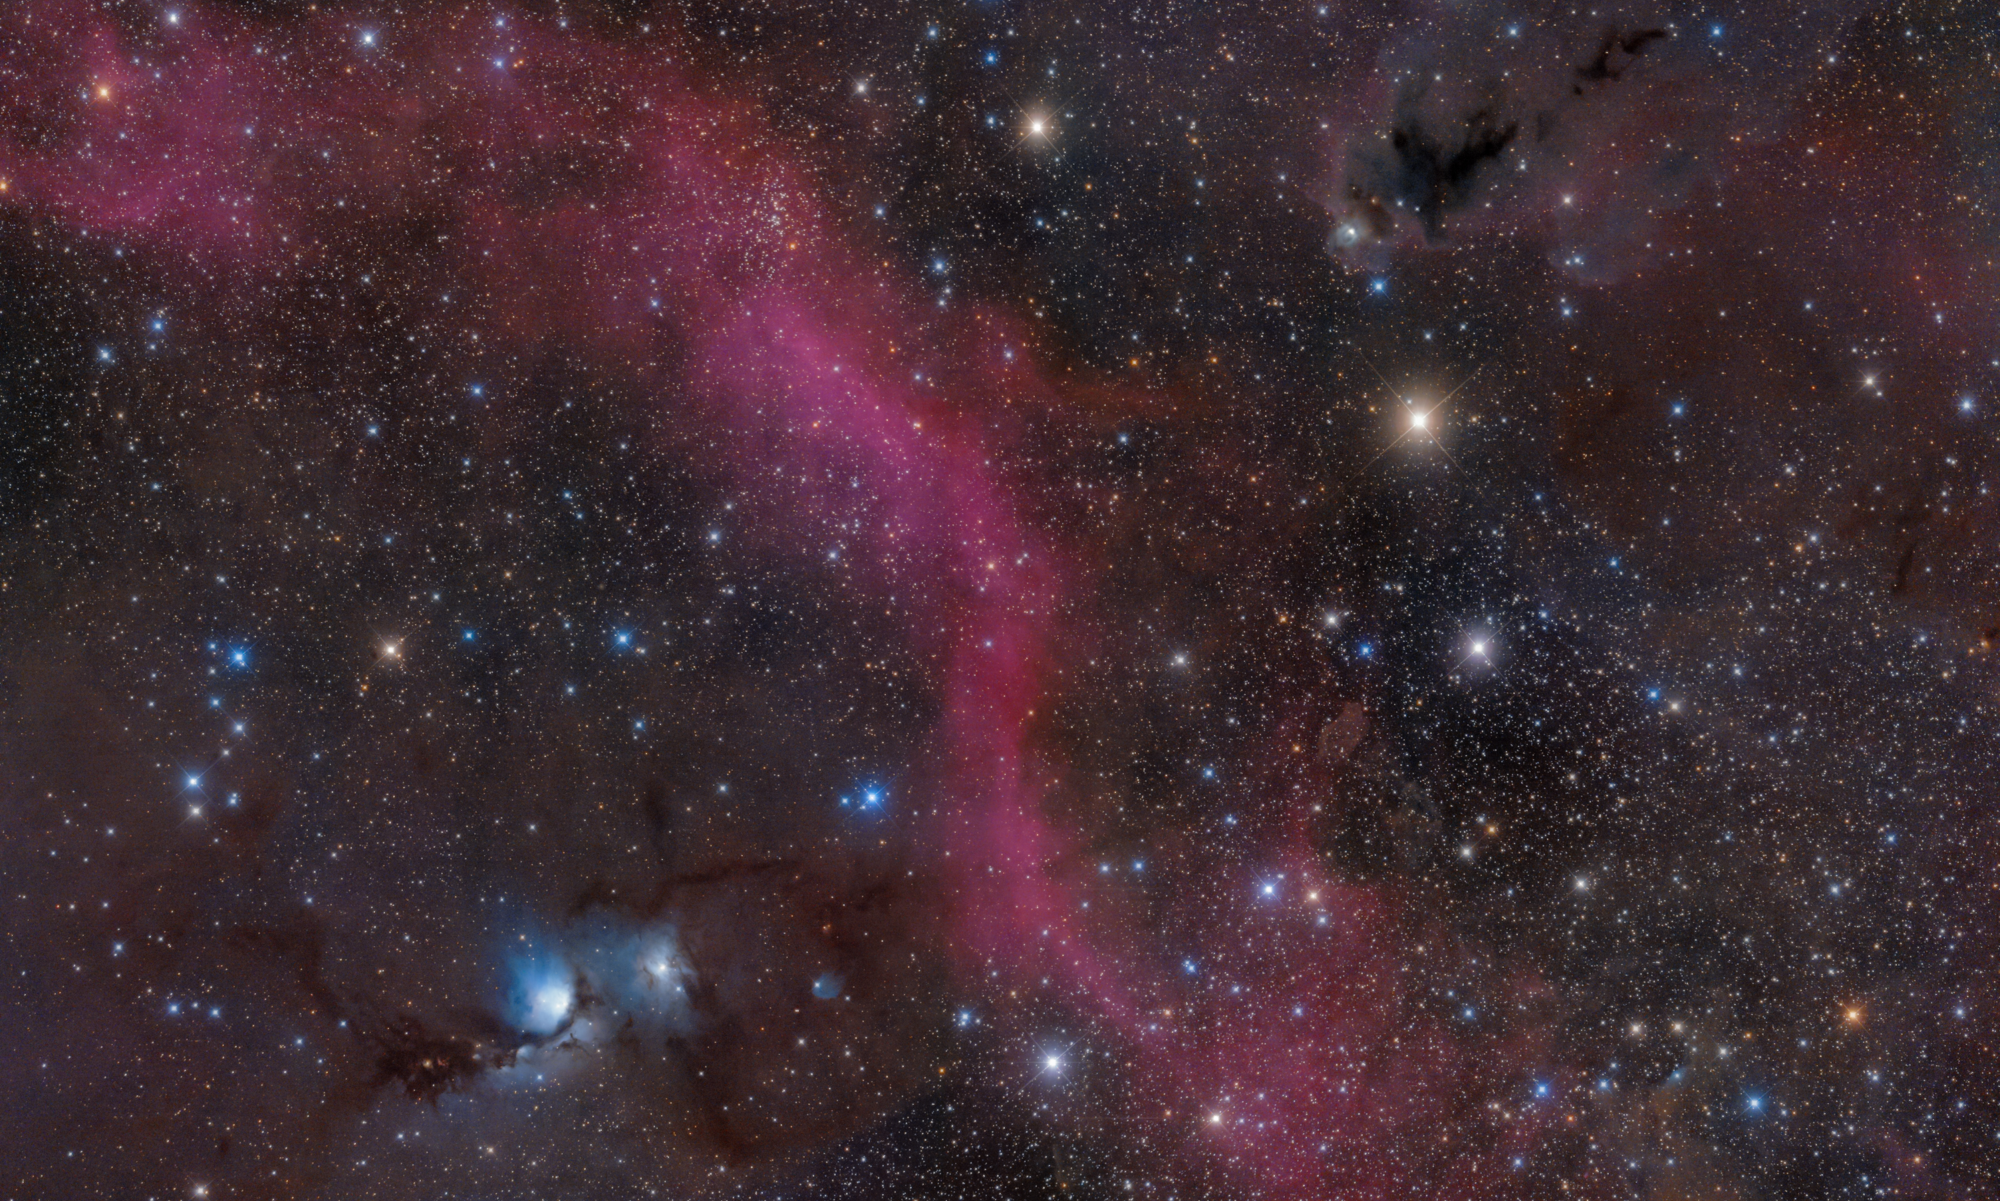
Vincent: Thanks; I didn't try the "Create Masters" button with everything loaded, but that could be a nice shortcut. Instead, I ended up doing things piecemeal, as per Mabula's tutorial. For the BPM, I loaded only darks and flats. I then created a master flat using flats, bias frames, and the BPM. I then created a master dark using darks alone, after which the lights were processed with the master flat, the master dark, and the BPM. Each time I went back to Load, hit Clear, and loaded only what was needed for that step. I followed this with Analyze Stars, Register, Normalize, and Integrate. All a bit head-spinning, but APP still looks so much easier to learn than Pixinsight, which was too much for me. I have a lot to learn, but simply playing with the black point slider produced a gratifying photo of Orion taken under dark skies last Tuesday. This is my first real astrophoto (film days efforts aside), and it is a tribute to APP that I got this far so fast. It should only get easier for the next time!
Note: The lens is a Sigma 85 mm f/1.4, but I had it stopped down to f/2.5
That's a great result for a first try (in the digital era 🙂 )! Yes, that's one of the goals of APP, to be easy and get very good results straight away (with the best calibration engine there is at the moment, for sure). I would use the light pollution option in the tools tab (9) to create boxes all around the image (doesn't matter if they include stars) and you'll get that gradient out of it as well.
Thanks... there were so many stars in the lower left corner that I didn't notice the gradient. I applied boxes for both "calibrate background", and "remove light pollution", and the result is clearly better. I might as well always do that.
Thanks... there were so many stars in the lower left corner that I didn't notice the gradient. I applied boxes for both "calibrate background", and "remove light pollution", and the result is clearly better. I might as well always do that.
First of all, that is a great result of this fantastic region to image to start with 😉
Let me respond to some of your questions :
Me again. I clicked instead on "create Masters and assign to lights", which wasn't obvious because I didn't load any Lights, only Darks and Flats, but this ran and ended up generating the Bad Pixel Map. No bad columns found, which was expected. So I may not need help at this point, but for a newbie it isn't clear what steps I need to take in what order. I will try and follow the DSLR workflow video and see where I get.
Oh, I did get this error message part-way through the BPM run:
CRITICAL WARNING: flat-field calibration can not be performed correctly!
To be able to perform accurate flat-field calibration, the provided flats need to be calibrated by either
- a MasterBias, of the same ISO/gain value as the flat frame, or - a MasterDarkFlat of the same ISO/gain value and the same exposure time as the flat frame, or - both
My thinking is that this can be disregarded, as I was only trying to build the BPM.
Indeed, bad column detection can be left disabled for DSLR camera's. It's only needed for astronomical CCD camera's.
And yes, the issue about improper flat calibration can be disregarded if you only create a BPM from the flats. I will make a note of this for development, that in this case, the warning shouldn't be thrown.
Vincent: Thanks; I didn't try the "Create Masters" button with everything loaded, but that could be a nice shortcut. Instead, I ended up doing things piecemeal, as per Mabula's tutorial. For the BPM, I loaded only darks and flats. I then created a master flat using flats, bias frames, and the BPM. I then created a master dark using darks alone, after which the lights were processed with the master flat, the master dark, and the BPM. Each time I went back to Load, hit Clear, and loaded only what was needed for that step. I followed this with Analyze Stars, Register, Normalize, and Integrate. All a bit head-spinning, but APP still looks so much easier to learn than Pixinsight, which was too much for me. I have a lot to learn, but simply playing with the black point slider produced a gratifying photo of Orion taken under dark skies last Tuesday. This is my first real astrophoto (film days efforts aside), and it is a tribute to APP that I got this far so fast. It should only get easier for the next time!
As you experienced, you can do everyting step by step. However you can also simply load all light and calibration frames and set all settings in 2)-6) and click on 6) Integrate. Then all will be done in a single flow in the right order 😉
Mabula: Thanks for letting me know that I can trust everything to happen in the right order with all files loaded in for one step integration. I am really impressed with APP, but am hungry to learn more. The pop-up tips are helpful, but either more of them, and/or a detailed PDF describing the various choices, especially in post-processing, would be great. Some simple bulleted workflow actions in order would also help for basic classes of work. But the fact that I got where I did in a single afternoon is really exciting. Awesome product!