
UPDATE FROM MABULA
I have had a very rough 2 months unfortunately health wise. I was struck 3x in a row with bacterial infections. The second infection occurred after a routine hospital checkup and I became very sick. I had to rest and take a lot of antibiotics. Once I was recovering and restarting work 1 month ago, I again became sick. The infection was not yet gone, so even more antibiotics and rest was needed. Needless to say, it took a lot of my energy and I needed a lot of rest.
Finally, the infection is really gone and my energy is coming back step-by-step now and I have started work again. I am terribly sorry to have kept you waiting for support. I will address all outstanding questions and e-mails step-by step and will be on the forum daily from today.
APP 2.0.0-beta47 will come soon as well, a lot of work was already completed before I became very ill, so the release is also nearly ready for you. Beta47 will be much faster actually. Many workflows will be more than 2x faster, mosaics can even be 10x faster than before because registration really received a major boost... all compared to beta46. Before I release it, I will make sure that everything is working properly and then I will release it.
Hi,
Seems to me a very great astro sotware!
When i am Loading master flats, the number of used light or flats doen't change. How can i be sure the software uses them?
Guido Van Gheluwe
Hi Guido,
Thank you for the compliment 😉
If you have created the master frames with APP then APP will recognize them as master calibration frames due to the metadata in the fits headers.
In the frame list panel at the bottom of the application, you can check if master frames are applied in the frame column.
In the frame column there will be marks giving you this information
- B , indicates a master bias frame
- D, indicates a master dark frame
- F, indicates a master flat frame
- BPM, a Bad Pixel Map
As an example, i have loaded 5 lights, 5 flats, 5 darks and 5 dark flats ( object M81 & M82)
I pushed "calibrate" in 2) CALIBRATE
This wil create the master calibration frames and will determine if the lights can be calibrated with these master calibration frames.
See the first screenshot after having performed the creation of the master calibration frames
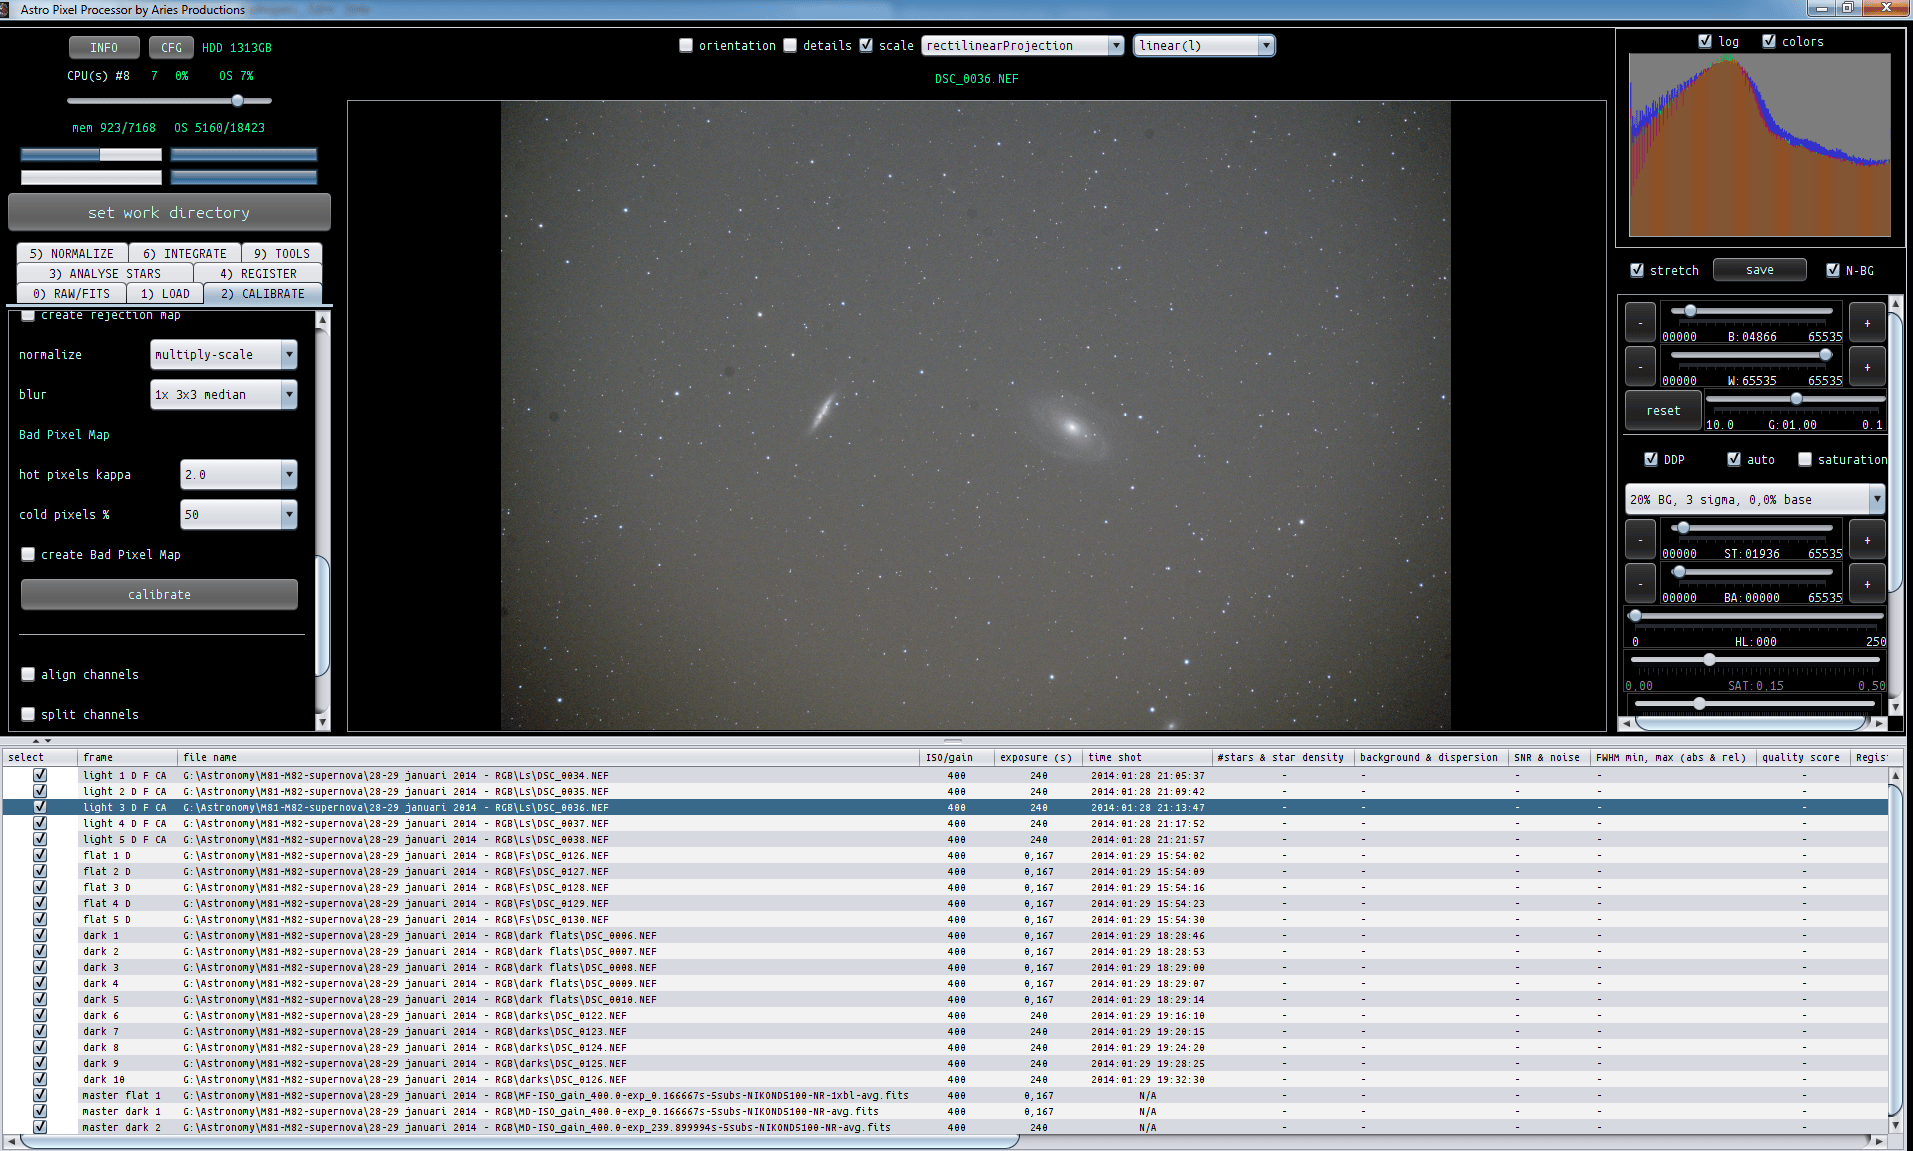
The first screenshot shows one of the light frames, loaded with the linear background neutralization option N-BG (just below the histogram). Notice the image viewer mode is set at linear(l). This shows just the raw data in your frame.
In the frame list panel at the bottom, check the information in the frame column. you'll see lights, flats, and darks. Next to the flats, you see a D (flat 1 D), this indicates that these flats will be calibrated with a master dark. (a master dark flat / flat dark). Check the darks, in the ISO/gain and exposure columns you can see that 5 of the darks have the same exposure and iso as the flats. The master dark created from these darks is to be found at the bottom of the list, showing the same ISO and exposure as the flats and the master flat. This means the master flat was created from dark subtracted flats, which is what we want. Always subtract a bias or dark from you flats.
You also notice that APP automatically has created 2 master darks, one for flat calibration and one for light calibration. This happens because the darks have different exposure lengths.
Next to the lights you see a D, F, CA (light 1 D F CA) this means these flats will be calibrated with a master dark (the D) , a master flat (the F) and that the frames have been calibrated (the CA) now.
The second screenshot shows the same light frame, but now with the l-calibrated image viewer mode. This directly shows you the calibrated light frame (without having to save it, APP calibrates your light frame directly in the image loader) so you can visually check if the calibration is working like it should. You can see that the vignetting and dust spots on the sensor are well corrected now.
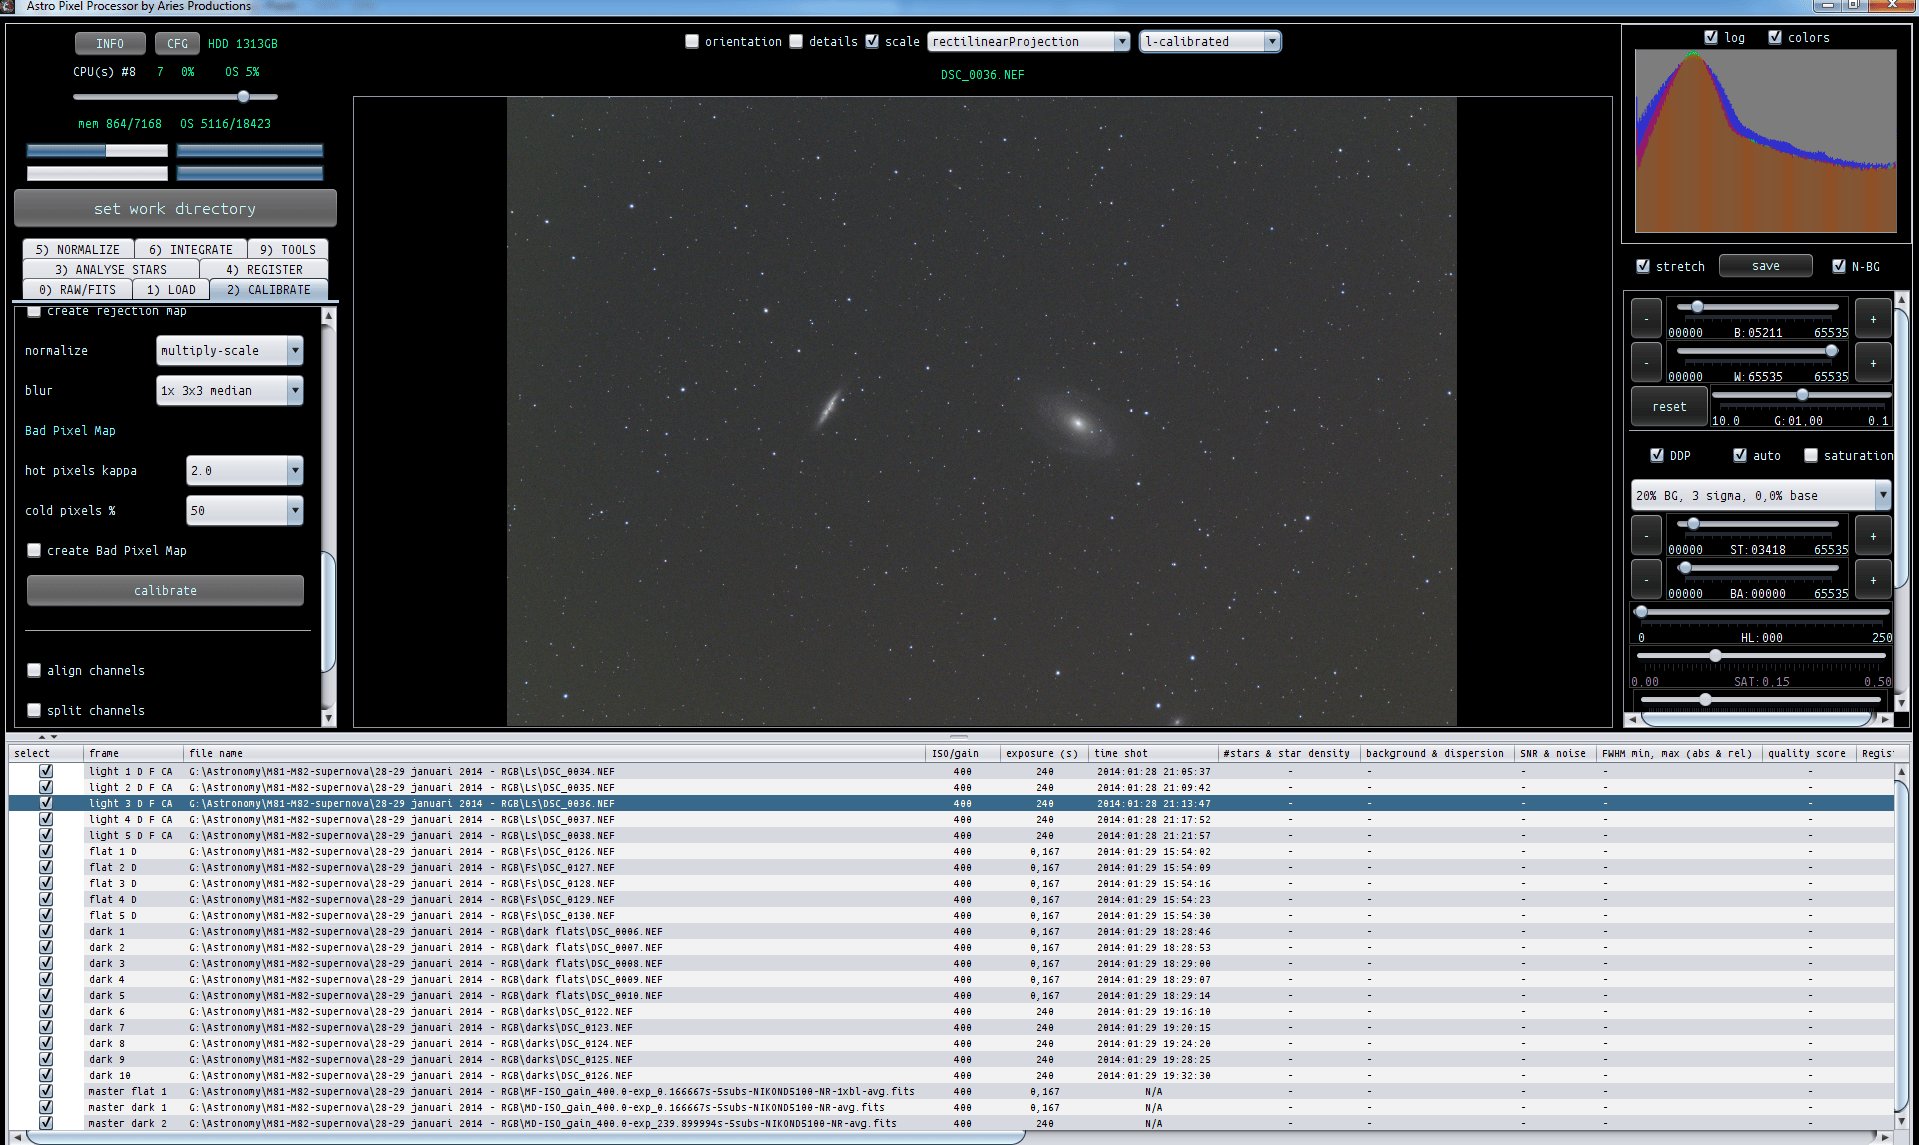
So the marks in the frame column of the frame list panel are showing you what kind of master calibration frames are found and applied in calirbation for your ligths, darks or flats (because darks can be bias subtracted, and flats can be bias and/or dark subtracted and BPM corrected) and the image viewer mode of l-calibrated give you directly the chance of visually checking if calibration is working correctly. It's a good habit to always visually verify correct calibration before starting with 3) ANALYSE STARS.
