It has a major performance boost of 30-50% over 2.0.0-beta39 from calibration to integration, for mosaics even faster! We extensively optimized many critical parts of APP. All has been tested to guarantee correct optimizations. Drizzle and image resampling is much faster for instance, those modules have been completely rewritten. Much less memory usage. LNC 2.0 will be released which works much better and faster than LNC in it's current state. Improved Outlier Rejection with LN 2.0 rejection. macOS CMD+A works now in file chooser ! And more, all will be added to the release notes in the coming hours...
Update on the 2.0.0 release & the full manual
We are getting close to the 2.0.0 stable release and the full manual. The manual will soon become available on the website and also in PDF format. Both versions will be identical and once released, will start to follow the APP release cycle and thus will stay up-to-date to the latest APP version.
Once 2.0.0 is released, the price for APP will increase. Owner's license holders will not need to pay an upgrade fee to use 2.0.0, neither do Renter's license holders.
hi all really struggling ,just trying to find a tutorial that just allows me to do very basic processing,i have 2x2 mins each of r,g,b frames of the dumbell,no darks, bias, flats and no ha or anything else,getting frustrated as all videos i see seem to have varying amounts of these extra frames please help 😥
these are the files if anyone could show me what i should expect thanks
I now have about 9 months experience of using APP, saw your request for advice and thought I would see if I could help.
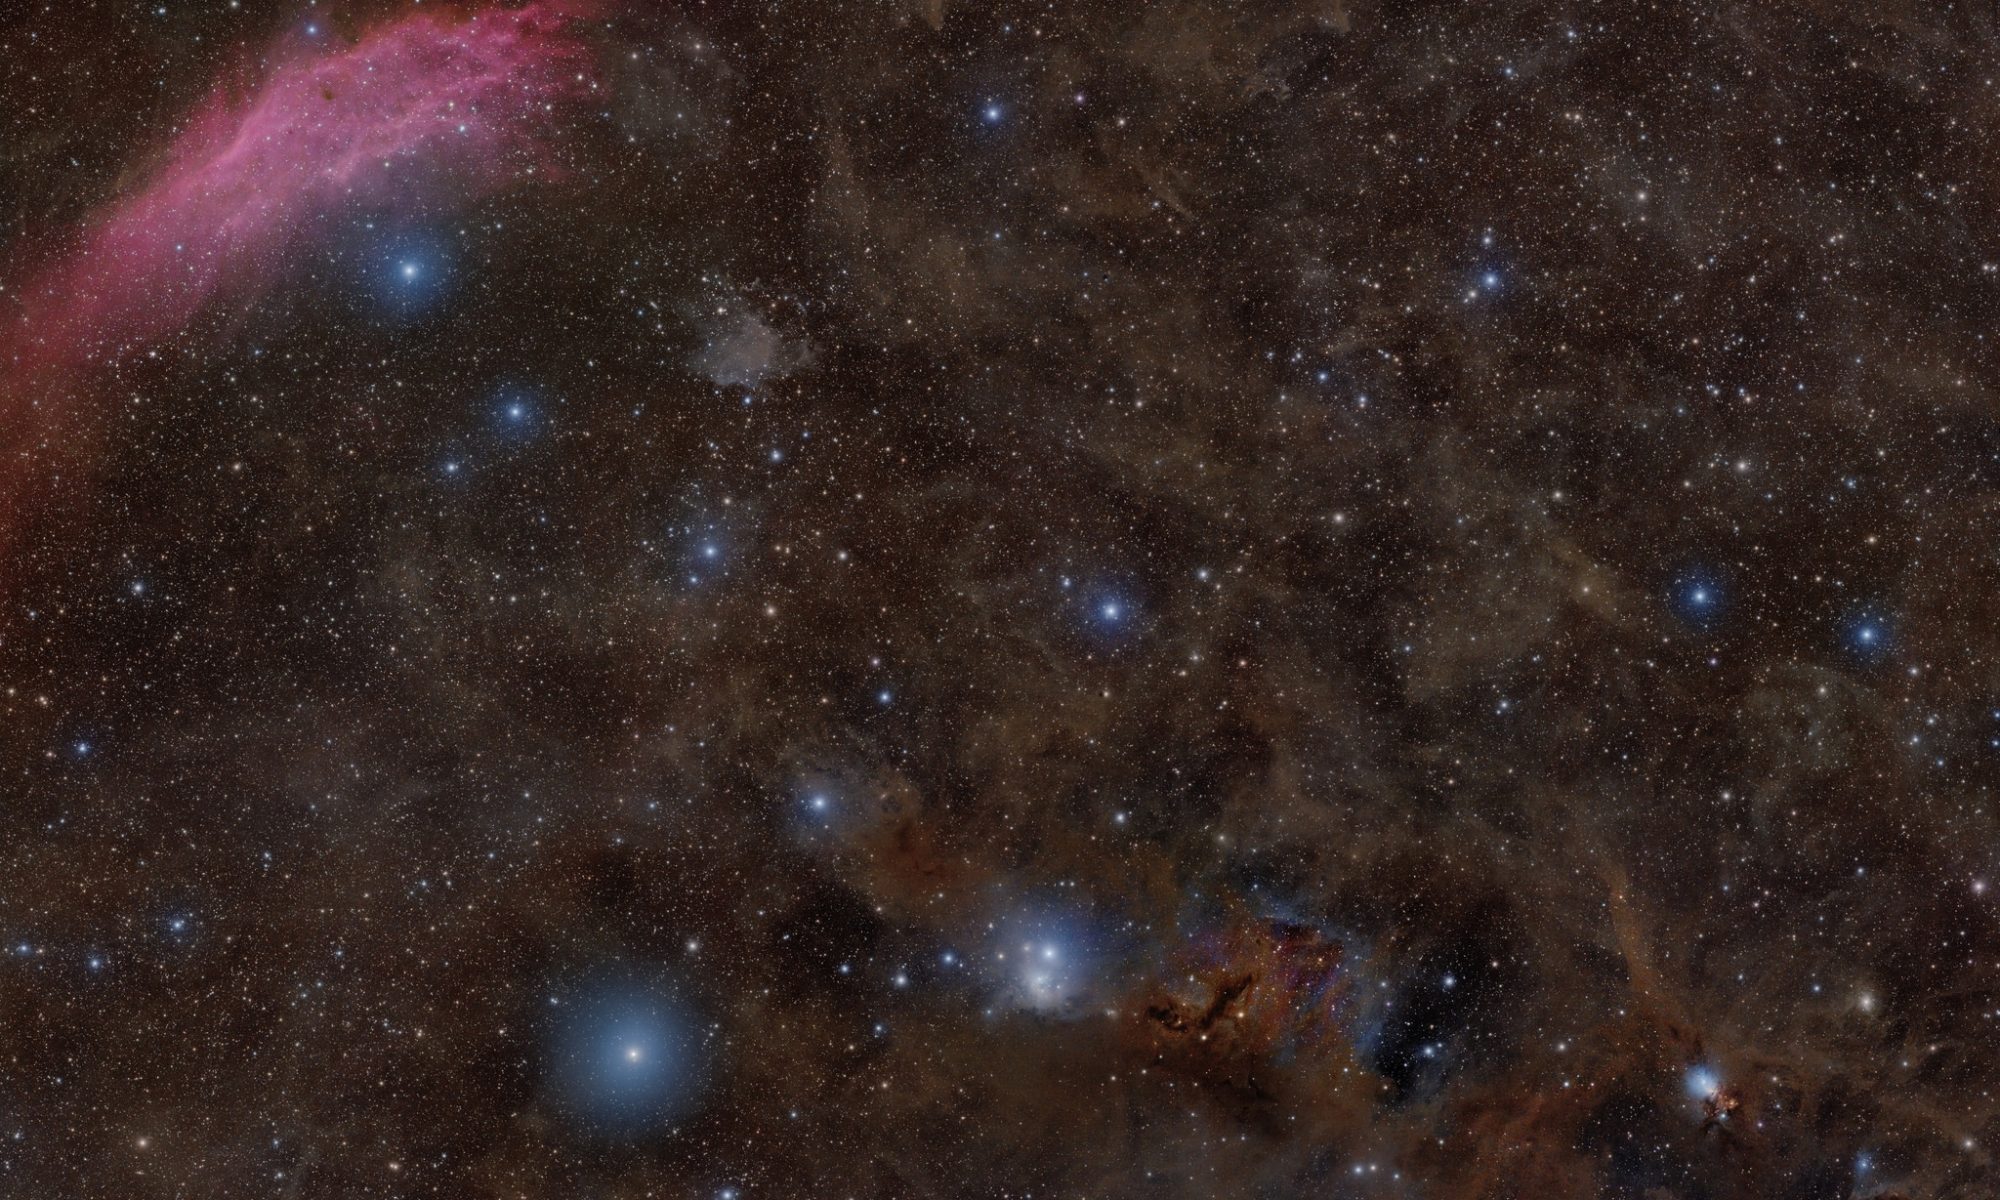
The result of my processing is as follows:
The steps I took are as described in these notes:
1. Start APP 2. Select your working directory 3. Select 1. LOAD 3.1 Select 'Multi-Channel / Filter Processing 3.2 Press 'Light' and at File Browser select your 6 files 3.3 At Screen to assign your image files to a channel/filter, select the 'apply "Filter" header tag' option
: At the foot of the main APP screen you should now see your 6 files with loaded as lights with the correct filter types assigned
4. Select 3) Analyse Stars as you have no Calibration frames to deal with. 4.1 Press the 'analyse stars' button - I left all the other parameters at their default settings 4.2 At the foot of the main APP screen you should now see star counts and some other APP metrics against your files
5) Select 4) Register 5.1 Press the 'start registration' button - I left all the other parameters at their default settings 5.2 At the foot of the main APP screen you will now see some values under the Registraion RMS heading. The RMS values are all low so there is no benefit to using the 'use dynamic distortion correction' option
6) Press 6) Integrate 6.1 You should see the 'integrate per channel option showing under Multi-Channel/Filter options 6.2 You have very few frames so most of the other parameters are mostly academic I think but I used the 'quality' option at Weights and 'Median' at Integrate 6.3 Press the 'integrate' button 6.4 When APP has finished its integration processing you should see 3 new files have appeared at the end of the APP file list for the RED, GREEN and Blue channels.
7 Select 9) Tools 7.1 Select the 'Combine RGB' option 7.2 Select 'add' 7.3 APP will present a 'provide file name' screen. The metadata tags on the files are correctly assigning these files to the correct RGB channels so you can just select OK at each of these screens. 7.4 Select 'calculate'. You will shortly see a color image of the Dumbell nebula appear. The red channel is a little out of sync with the Green and Blue channels but overall the image look most promising by just using the default settings. I pressed 'create' at this point but you might wish to experiment. 7.5 Press 'cancel' to return to the main APP screen and you should see the output file from the 'combine RGB' tool at the foot of the file list. Select this file into the image viewer.
8. Select the Batch Modify option under tools to crop your image file. 8.1 Draw a selection box on your image and then press 'crop OK' button 8.2 You will now see a new file at the foot of the file list with a '-mod' suffix. Select this file into the image viewer.
9. Select the 'remove light pollution' button though I have to observe that you image looks very clean. Can I ask the location where you took the images? It has much better skies than my home where I image! 9.1 After some playing around with selection boxes, I got this result. I am sure with some more time a better result would be possible.
9.2 Press 'OK and Save' 9.3 You will now see a new file on the file list with the suffix '-lpc-cbg'. Select this file into the image viewer.
10. At this point I went to 'calibrate star colours'. I settled on the parameter settings shown in the print screen but I'm sure these could be bettered.
11. For the final result I saved with the settings shown in this last print screen.
I have not spent a great deal of time on calibrating the star colours or final tuning ot the image but I think the result is reasonably pleasing. I think you would get a better result with the benefit of clibration frames as well.
hi mike thats a brilliant explanation and sure to help with my start in AP,really appreciate it,i needed to know im not wasting time taking the images, if they were no good,when you say out of sync do you mean the position of the dumbell,if so i dont know what happend as i use sgp to centralise the slew ect,just to answer the question of location im in south yorkshire uk,once again thanks for your time 👍
Just to clarify my remark about alignment, I was referring to the frame edges. If for example you dither during image capture there will obviously be some misalignment of the individual frames at the edges which will need to be cropped away after star alignment during processing. With your red frames I noticed a significant misalignment at the frame edges compared with the blue and green, more than would be accountable by dithering, so I guess something happened during image capture to move the Dumbell slightly off-centre. However regarding the Dumbell itself, there is full coverage of it in the RGB layers at the centre. And APP has accurately aligned the stars in each of the RGB layers to the same RMS levels as I see in my own images
I hope this clarifies. And I think for so few lights and without calibration frames you have a remarkably good result.
thanks mike strange dont know what happend,just added some more data ,but not sure how to make the back ground darker and some of the stars are a little brown but what a start you have hiven me thanks
hi all really struggling ,just trying to find a tutorial that just allows me to do very basic processing,i have 2x2 mins each of r,g,b frames of the dumbell,no darks, bias, flats and no ha or anything else,getting frustrated as all videos i see seem to have varying amounts of these extra frames please help 😥
these are the files if anyone could show me what i should expect thanks
I think Mike gives a great short and compact workflow, I have not much to add here, it shows you the rights steps at the right moment 😉 Thanks Mike for helping out !
The M27 result looks nice as well, allthough we would expect a little bit more green in the nebula. Perhaps this has to do with no calibration frames, since the bias pedestal hasn't bene subtracted, it could have a small effect on the colours. Or perhaps the constants parameters in Star Color Calibration were set a bit too low.
This tutorial is recommended for RGB processing, does include calibration, but shows a more or less complete processing:
thanks mike strange dont know what happend,just added some more data ,but not sure how to make the back ground darker and some of the stars are a little brown but what a start you have hiven me thanks