This is mainly a bug fix release for the reported bugs in beta47. In addition it has a significant User Interface performance improvement noticable when you need to process 1000s of images in APP.
2026-10-03 APP 2.0.0-beta47 has been released !
This is a very big release... many code optimizations/rewrites, many parts of APP are much faster and more precise, especially star analysis and registration are much faster ! Big mosaics will go much faster 🙂
And we introduce a new preview filter, which includes the new Adaptive Deep Sky Stretch and a General Levels Stretch, this has been long over due. The old preview filter (the panel on the right side to stretch and preview your data) has not been updated for a couple of years and it is a critical part of any APP session.
Adaptive Deep Sky Stretch or ADSS is a much more intuitive stretch algorithm. It is also color preserving (which is a great new addition in itself ! ) which means that the highlights are no longer bleached, color is maintained from the linear data while stretching. You can simply stretch your data using the sky background level and signal width sliders which work much easier and more intuitive. You no longer need to fiddle with the old complicated sliders with zoom buttons. All the zoom buttons for the sliders are made redundant. And you can enter slider values in the slider value fields yourself. I will make a youtube video in the coming days to explain and fully introduce ADSS. Once the video is ready, it will be highlighted on the forum.
RGB Combine upgrade !. The RGB Combine Tool has been rewritten mostly. The tool is faster and easier to use and most importantly, the Luminance slider to inject a luminance channel or channels into the RGB composite is now working correctly. It no longer bleaches the RGB colors. Combined with the new ADSS preview, you will get much better and easier great composites with great color! I will also explain this in a new youtube video.
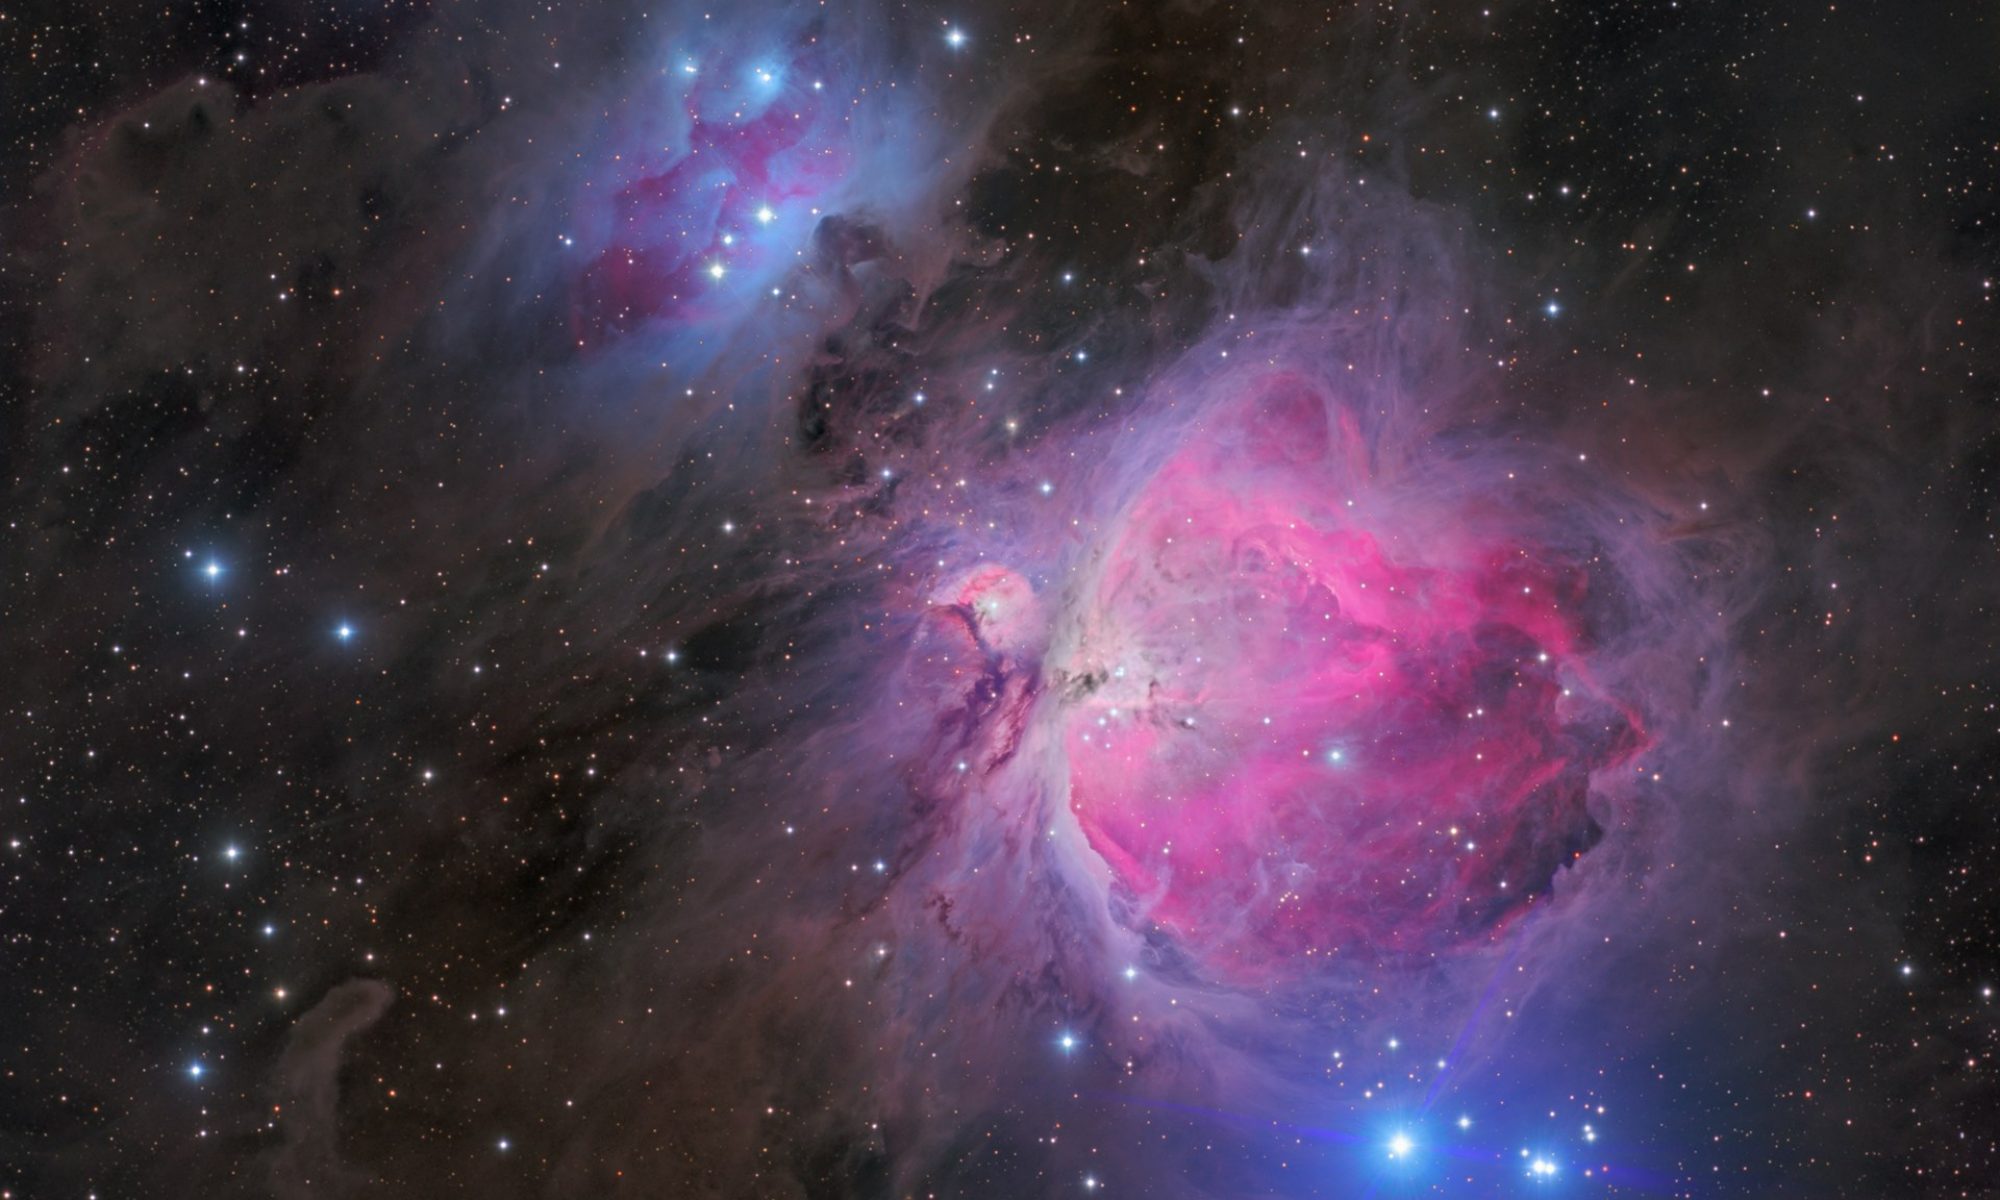
attached the M42 from a quick session last night (just over an hour including setting up and breaking down). I used 2 different exposure settings (30x 60 sec and 6x 300sec, iso200) to not overexpose the center. Unfortunately the center was still over exposed. Any advice which settings to use to integrate these lights? I am happy with the level of detail for an unmodded camera. Although i think my flats were not good enough, resulting in some lesser stacking result and a strange set of circles in the center. Hopefully my next try on this object will be better/solved... however the first thing that needs solving are the clouds over the Netherlands/Germany.....
Stack is cropped and post processed with APP and Lightroom. Integration was done with integration weight setting on 'quality'. In lightroom i had to pull back the highlights completely to expose some of the core, which makes some stars a little small. Attached also unprocessed subs of 1x 60sec and 1x 300sec exposure.
attached the M42 from a quick session last night (just over an hour including setting up and breaking down). I used 2 different exposure settings (30x 60 sec and 6x 300sec, iso200) to not overexpose the center. Unfortunately the center was still over exposed. Any advice which settings to use to integrate these lights? I am happy with the level of detail for an unmodded camera. Although i think my flats were not good enough, resulting in some lesser stacking result and a strange set of circles in the center. Hopefully my next try on this object will be better/solved... however the first thing that needs solving are the clouds over the Netherlands/Germany.....
Stack is cropped and post processed with APP and Lightroom. Integration was done with integration weight setting on 'quality'. In lightroom i had to pull back the highlights completely to expose some of the core, which makes some stars a little small. Attached also unprocessed subs of 1x 60sec and 1x 300sec exposure.
Any feedback/tips are welcome.
Cheers
Michel
Hi Michel,
Great start 😉
The quality setting in this case is probably not the most optimal integration setting. The quality weights will favour the images with tightest stars (which normally will would be the short exposure images) but also the images with most stars (usually the longer exposure images) and the images with the least noise after normalisation for dispersion (usually also the longer exposure images). So combined not the best setting probably. I think the result might be better if you select the star shape weight setting, that will favour the images with the sharpest stars which would be the short exposures. Maybe the results is a bit more noisy, but it should be sharper and the core of m42 should come out better I think.
Let me know the result 😉
Yes, I do see the circle artefact, this is pretty weird, haven't seen this before I believe. What kind of iso and exposure time do you use for your flats? I my experience, iso 100 with exposure times anywhere between 1 and 10 seconds for the flats work nicely. Shorter exposure times for your flats can cause all sorts of problems in my own experience.
The quality setting in this case is probably not the most optimal integration setting. The quality weights will favour the images with tightest stars (which normally will would be the short exposure images) but also the images with most stars (usually the longer exposure images) and the images with the least noise after normalisation for dispersion (usually also the longer exposure images). So combined not the best setting probably. I think the result might be better if you select the star shape weight setting, that will favour the images with the sharpest stars which would be the short exposures. Maybe the results is a bit more noisy, but it should be sharper and the core of m42 should come out better I think.
Let me know the result 😉
Hi Mabula,
attached the result with star shape weight setting. Indeed it does contain more detail and a bit more noise. I still used Lightroom to reduce the highlights. For some reason the core keeps over exposed. I am happy with the result though, considering that the circles annoy me. I made flats with ISO100 and about 2sec exposure. Hopefully i'll get a new chance to get the M42 anytime soon. I'll start over with complete new data and see the result then. For now I am happy.
Don't worry too much my friend this is the age-old problem. The core of M 42 and M 31 although really bright are not good subjects to learn on unless you are a masochist and want to handle the hardest stuff first. There are ways around it I haven't done it yet but you can integrate just the short exposures save me integration integrate the long exposures save that image. In Photoshop use the long image as a layer and the short image as a layer and use a magic tool to erase the top layer and expose the dimmer core on the layer below it. Good luck to you I know this is coming up for me as well.
On the priority list is noted that I will implement HDR combine in the RGB combine tool. That will enable you to have more control for these High Dynamice range objects 😉