15th Feb 2024: Astro Pixel Processor 2.0.0-beta29 released - macOS native File Chooser, macOS CMD-Q fixed, read-only Fits on network fixed and other bug fixes
7th December 2023: added payment option Alipay to purchase Astro Pixel Processor from China, Hong Kong, Macau, Taiwan, Korea, Japan and other countries where Alipay is used.
Hi,
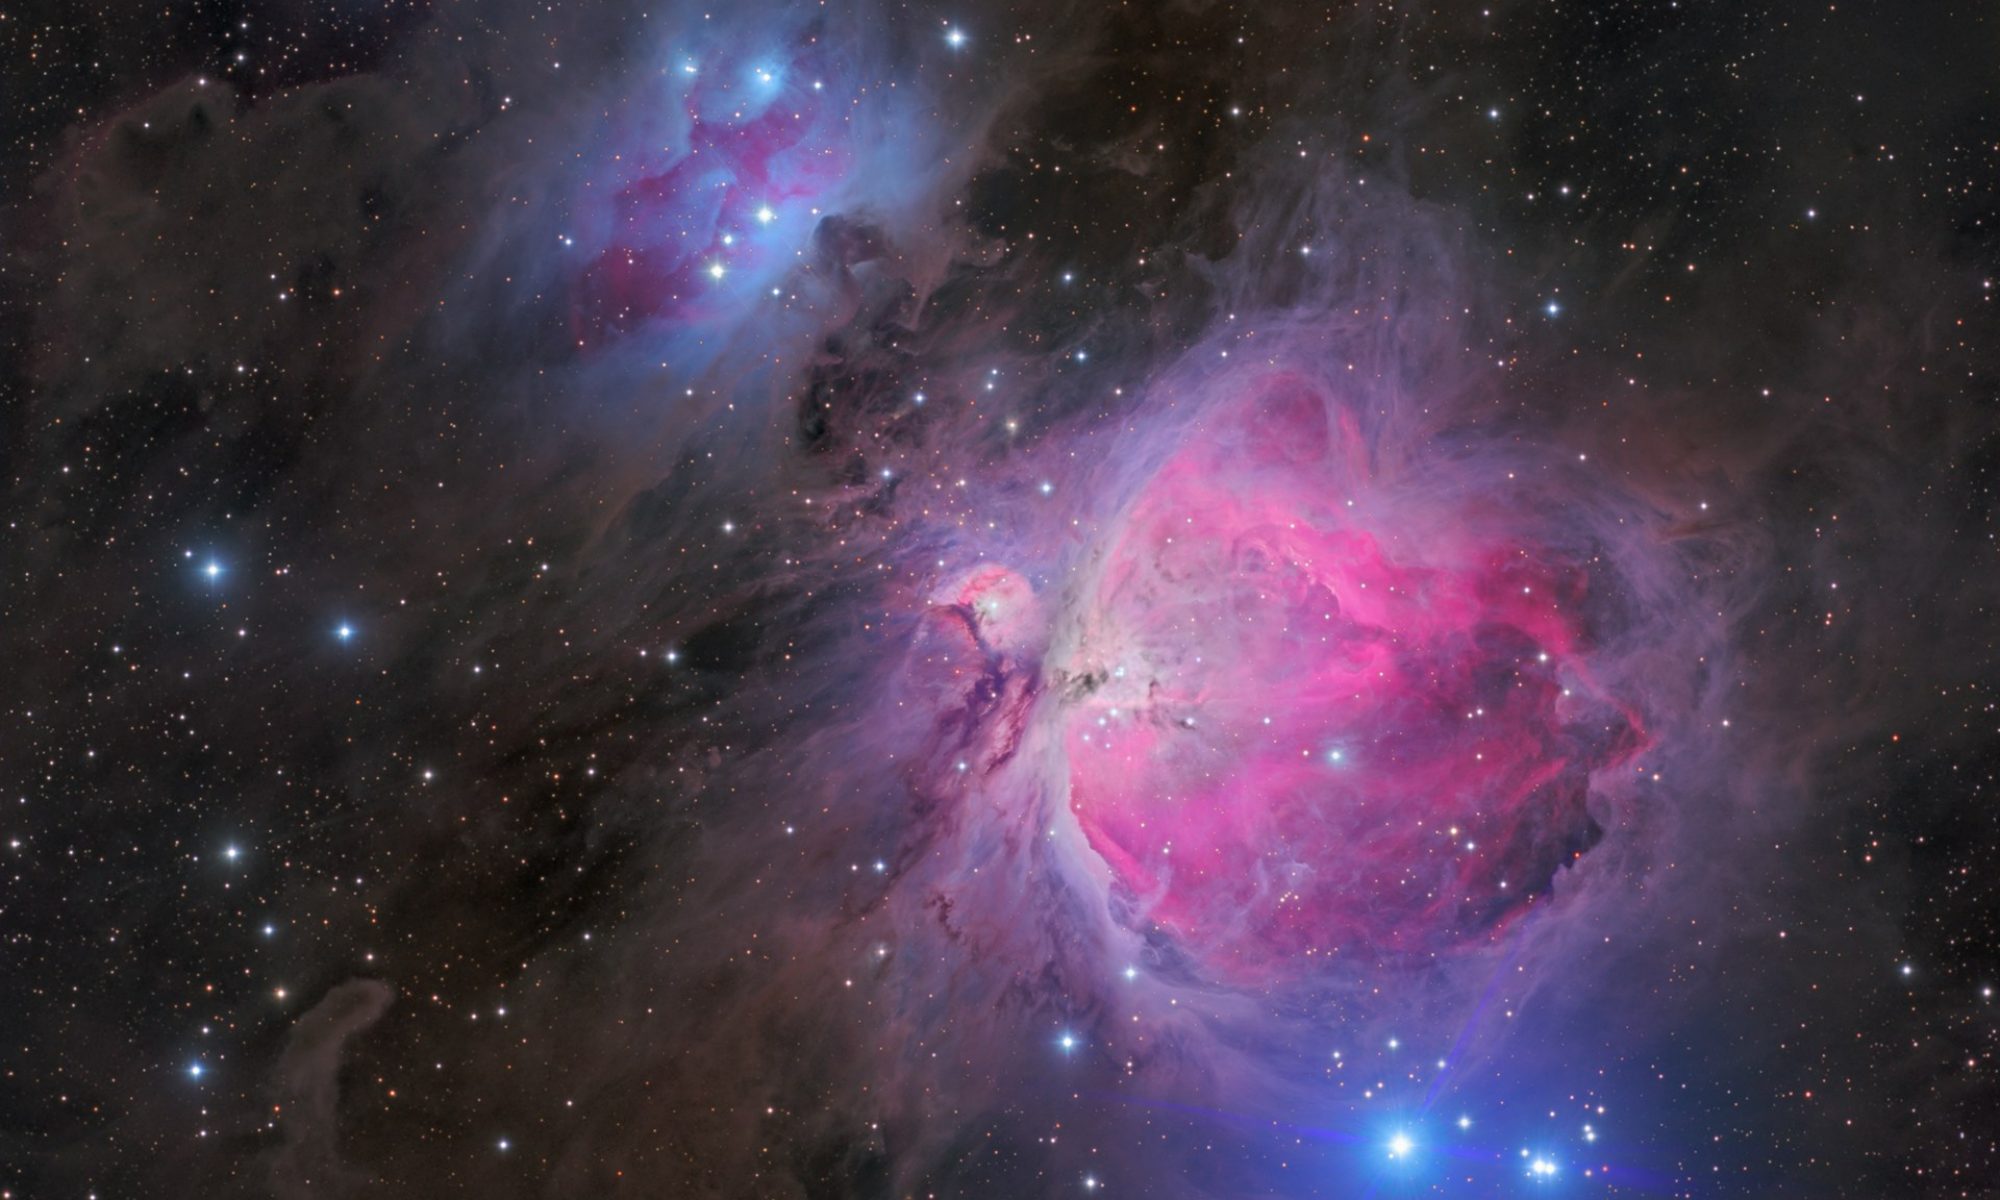
This was a "if life gives you lemons"-process, so please bear with me. The material used is spanning back up to 2 years. The actual plan was to make a clean HA OIII bicolor with a synthetic green channel from ha and oIII multiplied. The Ha acquisition went fine, but I had only 1 night before the moon spoiled the sky for OIII so I was pretty pumped to get most of that 1 night. Turned out, that my OIII clip in filter doesn’t like my Nikon 400/3.5 despite being slower as well as longer than my Canon 300/2.8 and having the last glass element before the sensor almost half down the ota. There were halos around every tiny star and they were almost as bright as the star itself. So I dug up old data from 2018 where I acquired around 15h of OIII with a Canon 300/2.8 with only moderate halos and preprocessed with more calibration frames and a carefully crafted a bad pixel map to match the, actually much better, ha data. OIII from 2018 with preprocessing from scratch turned out pretty good but the star sizes didn’t match at all, synthetic green channel wasn’t an option any more and so I dug up even older rgb widefield data for the star colors and used the ha star shapes as a mask with the difference of starnet++ subtracted by the normal stack in PS. So here is the hard data:
- 24h of HA in 300s exposures with Nikon 400/3.5, Canon 40d mono on NEQ6 with MGENII
- 15h of OIII in 100s exposures with Canon 300/2.8, Canon 40d mono on Star Adventurer with MGENII
- 2h of RGB in 30s exposures with Canon 300/2.8, Sony A7rII on Star Adventurer without auto guiding
Software used: cr2fits for file conversion, AstroPixelProcessor for preprocessing, stacking and light pollution removal, Lightroom and Photoshop for combining, masking and color correction, Starnet++
APP did a fantastic job of aligning all those different input materials. The layering however had to be done in Photoshop as I needed lots of masks and more manual tools to flatten the background at the edges.
CS and thanks for watching,
Ben

Below are the layers that where involved in putting this image together:

Very nice and thanks for the backstory! 😉 A little tip if I may; no need for file conversions, APP can read the cr2 files straight away and this is even preferred for making sure you get the best calibration possible.
Thank you. But how can I tell APP that the bayer cfa has been scratched from the sensor when loading cr2 files?
Ahhh, that's an interesting situation... not 100% sure, but maybe choosing "no interpolation" in the algorithm on tab-0 might work for that? It will show the raw monochrome CFA data.
edit: scratch that, I am sure that is the correct setting. 😉
edit: scratch that
I see what you did there 😍
Thanks for the advice. The wording just didn‘t ring a bell for me.
